
How To Make A Super Hero Cape
>> Tuesday, June 29, 2010
When Derek and I were engaged, we had a long and fervent discussion about super hero capes. Derek claims to have never worn one as a little a boy unless it was Halloween. I was horrified. I was then and continue to be a champion of little boys and super hero capes. I declared, "Our boys will have capes if they want them!" If I ever have girls, if they want them, they'll get them too.
And it appears that my boys love them. Spencer, more often than not, wears his where ere we go, grocery shopping, children's museum, the park, etc. He loves his. Henry likes his as well, but not with the same deep and unending love. And then Mr. Oliver decided he needed one too. And that is where this post came from.
So, without further ado:
How to Make A Super Hero Cape
First: Decide on the shape of your cape.
If you are newer to the sewing thing, I'd suggest going with a regular old rectangle cape. It's the easiest way to go. If you're more advanced, then a rounded edge makes for great swirling ability. See?
 |
| From The Diet Coke Diet |
But for today's demonstration, we'll just be doing a rectangle.
Second: Decide on a size.
Measure your kid from shoulder to where ever you want the cape to hit. Then add 4 inches to make room for neck-drapage. For a 14 month old toddler, I only needed 22 inches.
Then measure how wide you want the cape to be, if it's a rectangle, then just measure your kid's back and add 8 inches, give or take. (Have you noticed this is not an exact science?)
Third: Choose your fabric
For Oliver's cape, I am just using cheap cotton broadcloth (gold and royal blue), but Henry's and Spencer's are made out of a slippery nylon that they love. Don't go with stretch anything or fleeces. One of the CUTEST capes I ever made was for a little boy who loved frogs. I did two different frog materials on the inside and outside. ADORABLE. Make sure you take your measurements with you so you get enough material. I got a half a yard of each color for Oliver and that was enough for 2 toddler sized rectangle capes.
Fourth: Get some felt for the "super letter" and a a 1/4 yard of some material for the shield. You can use whatever you want for the shield, felt or fabric or whatever you want. If you want the shield to be stiff you can get some iron-on interfacing, but it's not strictly necessary.
Now for the sewing part:
Cut your cape's shape by using the measurements you took. Cut the inside and the outside at the same time, so they match exactly, just lay them together, measure and cut.
 |
| From The Diet Coke Diet |
Then, based on your cape's size, cut out your "super letter" and shield. How?
Well, go to Microsoft Word on your computer and find a font you like, the right size, and print. I believe my "O" was Arial sized 700. It may take a couple of tries to get the right size. No worries.
For the shield, go to Google images and google "Cartoon shield" and pick one that works for you. Save it to your computer and put it in either Microsoft Word or Paint.net or Photoshop and resize it. And print.
Now you have your stencils.
If you want to do the interfacing for your shield, pin all the layers together, paper stencil, fabric and interfacing, cut it out and iron it. If you don't want interfacing, then, just pin the stencil to the fabric and cut it out.
Same with your letter stencil and the felt.
 |
| From The Diet Coke Diet |
 |
| From The Diet Coke Diet |
If you used fabric for your shield, you'll need to turn the edges under and sew them, so it won't fray. If you used felt, then you're fine, no turning under needed.
 |
| From The Diet Coke Diet |
Then, center the letter on the shield, pin and sew. I usually go around the outside of the letter and the inside, for a nice finished look. Plus it's more secure that way.
 |
| From The Diet Coke Diet |
Once your shield is done, find the dead center of your cape (the outside of course) and the dead center of the shield, line the centers up and pin the shield to it.
 |
| From The Diet Coke Diet |
 |
| From The Diet Coke Diet |
Sew the shield in place, all the way around.
 |
| From The Diet Coke Diet |
Now for the neck curve.
Right sides together, and pin.
 |
| From The Diet Coke Diet |
 |
| From The Diet Coke Diet |
Fold the cape in half, hot style so the curve matches all the way around. Then you can just eyeball the curve, too little and you'll have to do it again, too much and you'll just have a droopier cape, no biggie.
 |
| From The Diet Coke Diet |
 |
| From The Diet Coke Diet |
 |
| From The Diet Coke Diet |
And flip right side out. You'll have to really jam your fingers in the corners and edges to get it all square.
 |
| From The Diet Coke Diet |
Turn your 6 inch seam you left open closed, pin and sew.
 |
| From The Diet Coke Diet |
 |
| From The Diet Coke Diet |
I did a hook and eye type closure for this one, cuz it's what I had.
 |
| From The Diet Coke Diet |
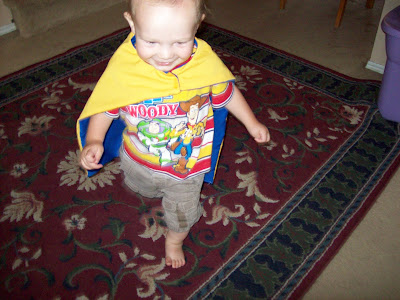
SUPER OLIVER!
 |
| From The Diet Coke Diet |
 |
| From The Diet Coke Diet |
Cool, eh? And easy. This took me less than a hour from start to finish, and that included printing my "stencils." Easy. Quick, and your kid will think YOU are the super hero.
What's better than that?


5 comments:
Wow! Thank you so much for this post. Just yesterday, I noticed my 2 year old had "re-purposed" our couch arm covers as a mini cape and thought - I wish I knew how to make a real cape...and voila - there was your post today.
Thank you!!
capes are an essential part of boyhood. But despite, the abundance of boys in Derek's home of origin, when then lived near us, I don't remember them wearing capes either. Jumping off furniture in an attempt to fly like a superhero, yes, just no capes :)
I made my boys felt capes long ago with thick ribbon ties glued with super glue, I think (didn't need drag out the sewing machine--I was pregnant) that lasted for several years. Then, my mom made all the grandsons capes a year or two back--with snazzy shiny material in the color of choice--we decided not to put emblems of any kind on them to maximize the things they could be. Yours are adorable. They will make happy boys in your home for years to come!
Thank you so much for this tutorial! It gave me the confidence to finish my sons Halloween costume! Now I want to make one for myself! :)
Midwest Momma- You are welcome. :)
Thanks sooo much for this tutorial. After a nice sweep through the web I came across your sight. Your instructions were so much less complicated and so much less precise :) I loved them. I am almost finished with my 5 year old son's cape. He is Super Ishmael (with a capital I. I skipped the stencil part and just wionged it so mine is maybe not so perfect but hey, it worked. I added some triangle like little poin tys at the end and they actually tuned out okay (not quite a scalloped edge but that sort of thing.
All I have to do is add a button and attache the applique! Thanks so much, this was great. (now my daughters are drooling for theirs!
Post a Comment