Candy Corn Halloween Treat Bags
>> Friday, October 28, 2011
Hello DCDer's! How's your October been? We've been great, here in Alabama. 2 birthdays out of the way (Little Man is 1! I am older than 1!) and now on to Halloween! We are planning to take our Little Yoda around trick-or-treating on our street and I wanted him to have a treat-holder-thingy that he can carry by himself (Doing things BY HIMSELF is very important to Little Man these days) and all of the retail options I could find were either 1. Ugly or 2. Way to big for him to carry around. So, I decided to make a little bag myself. I came up with a cute, little drawstring bag that is SO, SO easy and can be made in approximately 15 minutes. No lie. AND, as an added bonus, you can make it any size you want, so if you have bigger trick-or-treaters, you can make yours bigger. Or smaller. You know. Whatevs. Here's the little bag:
You'll need: (this is for an 8 inch-ish, square-ish bag, you can change the measurements to make the bags whatever size you want...more on that later)
1 strip each yellow, orange and white fabric cut to 16 inches by about 3 inches (these measurements don't have to be perfect...just close enough)
Some thread to sew the thing together
Now:
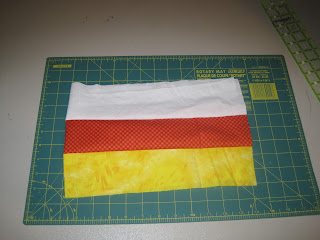
1. Sew the strips together along the long side: yellow, then orange, then white. Like this:
3. Fold this in half "hamburger" style (so it's basically a square. It won't be perfectly square. That's okay) and sew the bottom seam and nearly to the top on the side seam. DON"T SEW THROUGH THE FOLDED OVER PART. That's where we are going to put the drawstring. Just stop right at the seam you made when you folded over the white strip. It should look like this now:
Mostly square, inside out, top casing isn't sewn shut. Good to go.
3. Take a strip of scrap fabric about 16 inches long and about 1/2in wide and stick a safety pin through one end. Use the safety pin to thread the strip through the casing at the top of the bag. Make sure you leave one end hanging out about 2 inches, other wise you have to pull it out and start again. The fabric will bunch up as you do this. Just keep pushing the strip through and straightening out the bunches as you go. It sounds more complicated than it is.
4. When you have the strip all the way through and hanging out of both ends, get all the gathers out of the top, so that the bag will lay flat again and tie a knot as close to the bag as you can, then trim the excess strips. On the left, bunchy. On the right, pulled flat and tied off.


0 comments:
Post a Comment